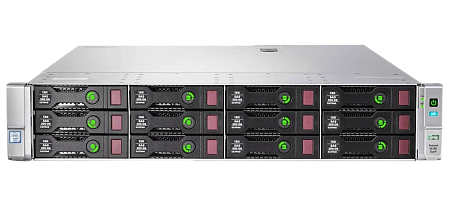
Creating your own website requires its initial testing, and only then uploading it to the network (taking into account that the site should only work on your local network). For these purposes, you can use your PC or laptop by creating a server on it.
Completing this task will not require much time and effort. The only difficulty is ensuring the stability and continuity of the server. This is necessary, since it is almost impossible to independently control the operation of the server, as well as a working connection to the Internet.
As mentioned above, to create a reliable server for free, your laptop or computer must be connected to the Internet or local network (home Wi-Fi router). The method considered in this article is relevant for the Windows 10 or 11 operating system.
Specialists are always ready to provide support if problems arise when creating a server. IT engineers from ittelo.ru company will help resolve any issue inexpensively and in a short time.
Installing a web server, hosting site files
This process requires the following steps:
Step № 1. To create a server, you can use the official Open Server service which is stable, safe and reliable. It has an easy-to-understand interface as well as many useful functions. Using the official website, you can find all Open Server options. Here you can install and start the server. If the installation was successful, a green flag would appear on the taskbar.
Important to remember! The absence of Microsoft Visual C++ may result in Open Server not starting. You will need to give permission to download it when installing the server.
Step № 2. on the local drive “C” you need to open the Open Server installation folder. Next, you need to go to the "Domains" section. Now it's time to create a new folder (you need to give it a name based on the name of the site address).
You need to place the site files in this folder (+ placing one test file for verification – it would be enough).
Important to remember! The site address must be unique. if you create a site address that is already in use, then when you open it for public access in the future, you will not be able to register the domain (reg.ru service will help check if the address is already used).
Setting up access to a site over a local network using Open Server
Step № 1. You need to click on the Open Server icon (checkbox on taskbar) to set required parameters for accessing the website. In the menu that appears, you must first open the “Settings” item and then go to the “Modules” section. For the proper operation of your site, you need to set the parameters MySQL, HTTP, PHP in the “Modules” section.
Step № 2. Next, you should go to the “Server” section and allow launching in aggressive mode (this should be done to keep the server running when minor errors occur).
In the “Server” section, you must first find the “Server IP address” item, and then select the “All available IP” option. The last point is to click the “Save” button (in the lower right corner).
Step № 3. At this stage the main task is to determine the local IP address of the PC or laptop (through which Open Server was installed). You will need it to launch the site. If you are connected to the Internet via wi-fi, then all you need to do is open the router settings and find your device (list of connected devices). The address in digital format will be written next to your computer name.
Important to remember! In the router settings, it is recommended to assign the found IP to the computer from which the server was launched (this is necessary if several devices are connected to the same router). Otherwise, the address may be assigned to other devices on your network.
Step № 4. After determining the IP address, you need to go to the “Aliases” tab in the Open Server settings. The IP address must be entered in the “Source Domain” field. Your website address should be indicated in the adjacent field “Target domain”.
Setting up access to the site from the Internet via IP and domain name
Using the IP address entered in the “Source Domain” (for example: IP 123.345.7.8), the site can be opened within your local network from any device. According to the “Target Domain'' the site will be private. It will be possible to launch it only from the device on which the server is running. You can allow access by domain name to another device by editing the system hosts file (you need to add a line to it, for example: 123.345.7.8 newforme.site). To open a site not by IP, but by domain name, the procedure described above must be performed with all devices from which you plan to open the site.
Next, we will find out how to open a website to all Internet users. You should determine the type of your external IP address. It can be:
- "white" (there is no need for additional actions with the address, provided that such an IP was initially set by your provider) or
- "gray" (we will consider this option in detail below).
The occurrence of a possible connection error means that the IP is “gray”. If it happens, you will need to order the creation of a “white IP address” from your provider. The price depends on the Internet companies.
Step № 1. Let's proceed to allowing access (provided that you already have a “white” IP). First you need to enter the router settings program to find out the external address number. In the window that appears, open the “Connection Status/Information” tab. The external IP will look like: 10.987.654.321.
Step № 2. Next, in the router settings, forward ports 443 and 80 to the device on which the website was created and “home” hosting was installed. There is also a simpler and more convenient option – connect a DMZ host for your device. To do this, you need to activate the “Status” line, and in the “IP address” line, which is located below, enter the internal IP address.
Step № 3. The next step is to associate the domain name and external IP address. In the Open Server settings go to the “Aliases'' section. In the “Source domain” field enter the external IP (our example: 10.987.654.321), in the “Destination domain” – the website address (our example: newforme.site).
Now, you can open the site using any device connected to the Internet (you just need to type the external IP address in the browser search bar).
Step № 4. Further, you need to register the site so that Internet users can find and open it by domain name. IT specialists of the ittelo.ru. company can help with this. The domain name must be free and not previously used anywhere.
Next, you should open the “Manage DNS Records” section at the domain registrar and add the following record “A external IP” (for example, A 10.987.654.321). This is necessary in order to associate the address with the domain name as well as automatically open the required site when requesting a domain. The server will start working in about 30–60 minutes. If you try to load the site earlier, an error or “stub” may appear.
Important to remember! For continuous operation of the site, you must always remain online, since access to the site may be limited due to network failures, disconnection of the device on which Open Server is installed, etc.
Engine Installation
The final stage of creating your own server can be implemented through various services. We considered an example based on WordPress.
Step № 1. You have to download the site engine in an archive format (usually ZIP) to the device on which the server is being created. Next, right-click on the Open Server icon (green checkbox on taskbar), in the “PHPMyAdmin” tab select “Advanced”.
Step № 2. A database creation menu will appear in front of you. In the appropriate line, enter the necessary name and click “Create”.
Step № 3. In the Open Server menu, you need to open the "Domains'' section and create a folder. Don`t forget to give it the same name as your site (our example: newforme.site). Files from the ZIP archive of the site engine must be transferred to this folder.
The name of the “wp-config-sample.php” file needs to be changed to “wp-config.php”. After you have changed the file name, open it.
Step № 4. After opening the file, find the “DB_NAME” field and enter the name of the previously created database in it, the user name in “DB_USER”, and leave the “DB_PASSWORD” field empty.
Now you can enter the website address into the search bar of any browser and try to open it (if any problems or errors occur, restart Open Server and try again). After successful download, a welcome window will appear. Here you need to enter the following information:
- site name,
- username,
- password,
- email.
After this, the site will start working on the WordPress platform (devices with IOS and Android operating systems should open the site).
Despite the fact that the considered process of creating your own server for a site is a simple, fast and reliable way to open access to it for users from the public and local networks, there are several points limiting the use of this method:
- Large load on the central process when a significant number of users visit a site running on a “home” server.
- Always-on mode of the device on which the server is installed, as well as constant and secure Internet connection. Disconnecting the Internet or working device leads to an instant stop of loading the site. You can connect to two providers at once for greater security.
- The need to register a “white” IP address. This service is paid and almost always expensive. We recommend renting a paid server right away.
Important to remember! We also recommend placing the website on an SSD drive for faster loading.
Thus, the considered method is better suited for a small forum designed for a limited number of users. This method is simple, but quite expensive, аnd saving money when creating a public site is not practical.
Specialists of our company are ready to help you purchase the server and select the necessary server configuration for any required task.


