In today's guide, we delve deep into the intricacies of setting up RAID arrays on the Gigabyte R182-N20-00 server, a powerful piece of equipment many enterprises trust for their data management needs. Leveraging the capabilities of the built-in hardware MegaRAID SAS 9361-8i controller, we'll provide a step-by-step tutorial to ensure you get optimal performance and data protection. Whether you're an IT professional or a beginner just getting started with server configurations, this comprehensive guide will assist you in achieving the best RAID setup for your server environment. Read on to harness the full power of the Gigabyte R182-N20-00 and ensure the safety and efficiency of your data storage.
At Newserverlife, we're dedicated to guiding you through the intricate processes of server setups. Previously, we've successfully configured a RAID10 array using four drives through the BIOS. Now, let's dive deep into the step-by-step creation of another RAID10 array, also utilizing four disks.
Powering Up and BIOS Access: Turn on the server. To access the BIOS, press the Del key.
Creating a RAID10 Array
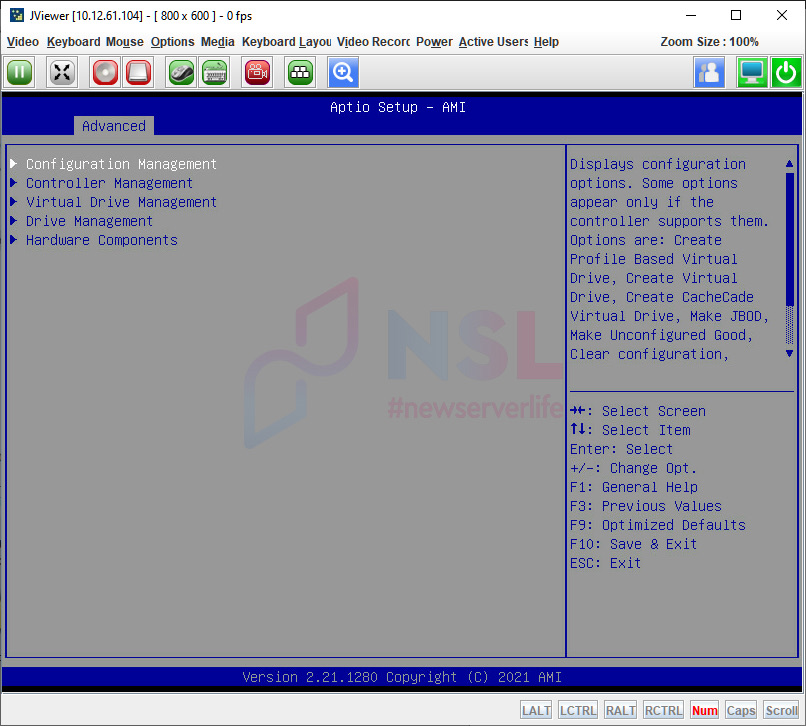
Navigate to the Advanced menu.
You should spot the AVAGO MegaRAID <AVAGO MegaRAID SAS 9361-8i> Configuration Utility. This appears because the server booted in UEFI mode. If you've set the boot mode to Legacy in the Boot section, this option won't be visible. However, you can access the RAID controller's configuration utility by pressing a specific key combination during boot. Make sure to read the on-screen prompts.
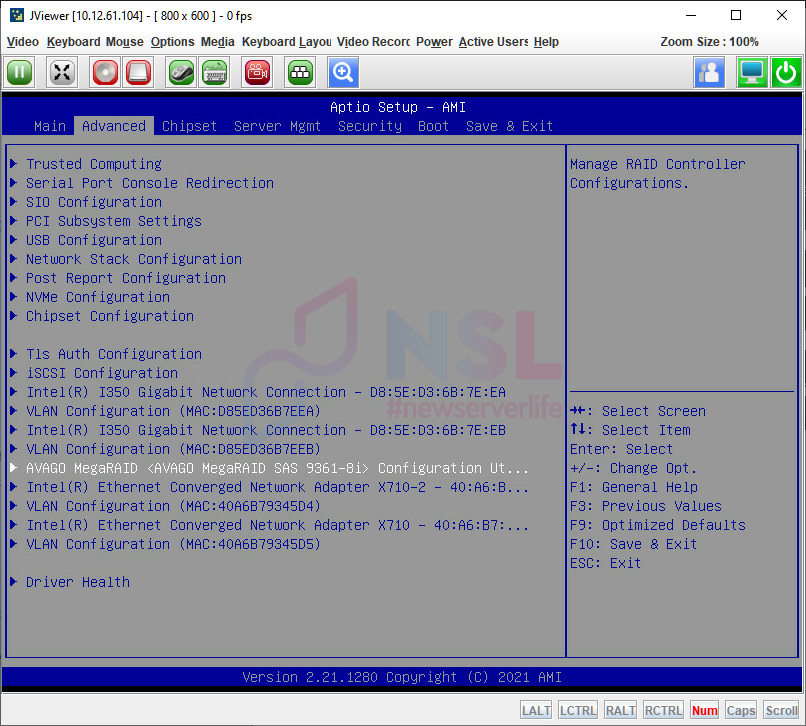
Observe that a battery is present, there are 8 drives, and a RAID array has already been established. Go to the Main Menu.
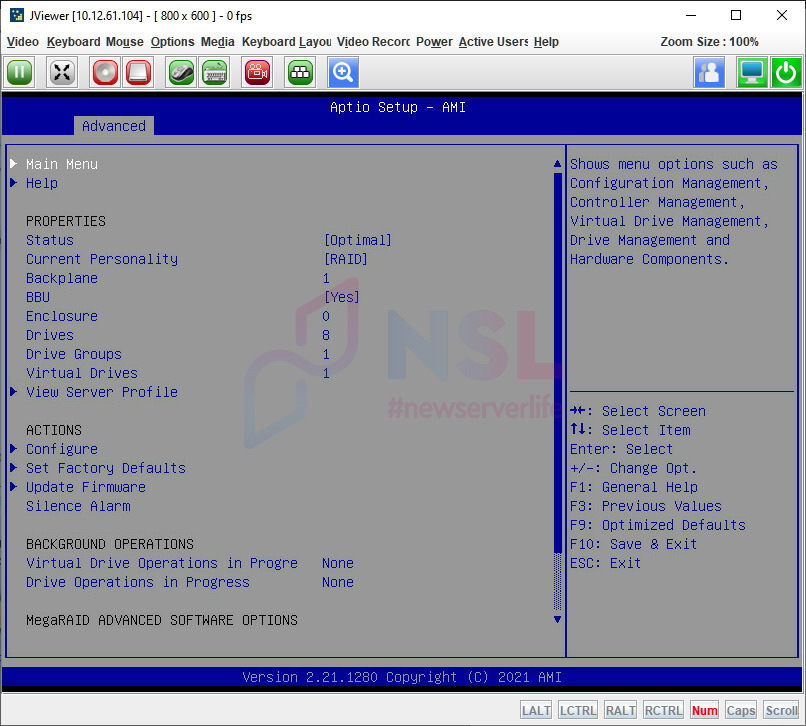
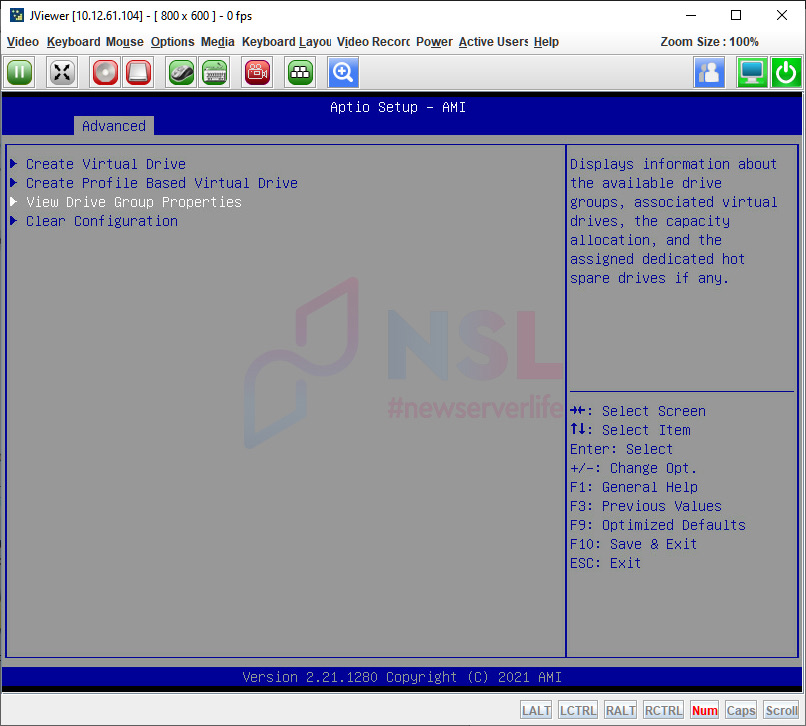
Choose Configuration Management.
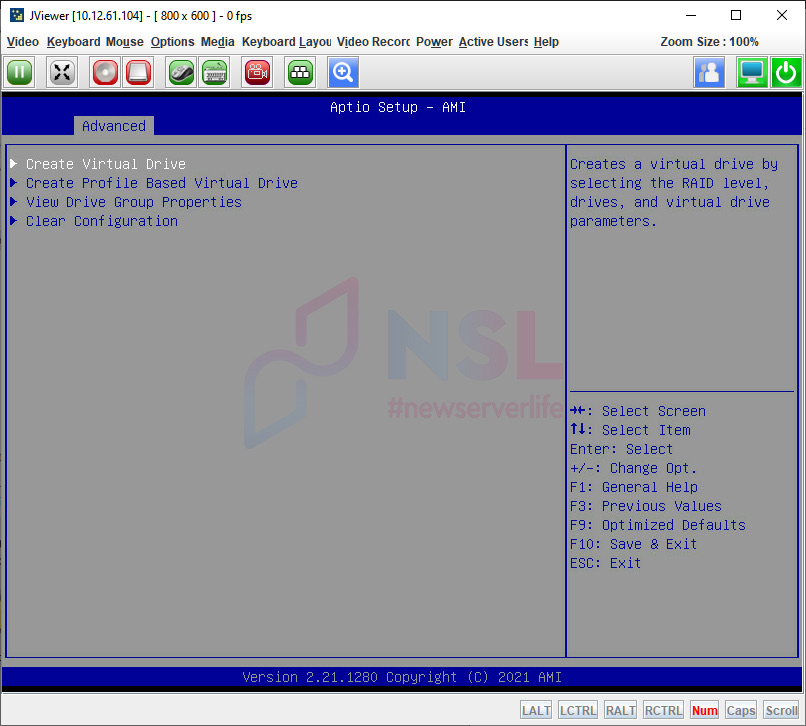
Select Create Virtual Drive.
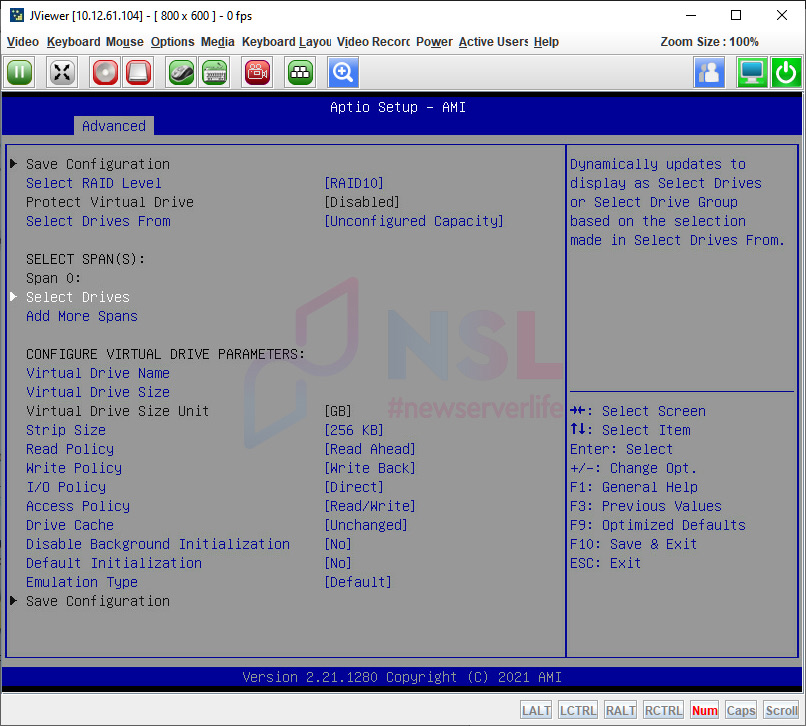
Set the array level to RAID10.
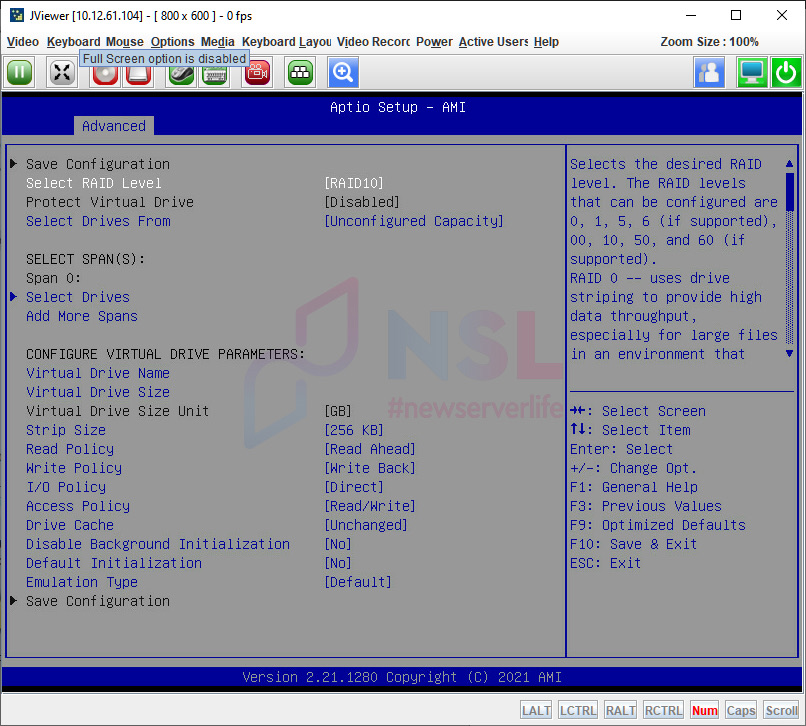
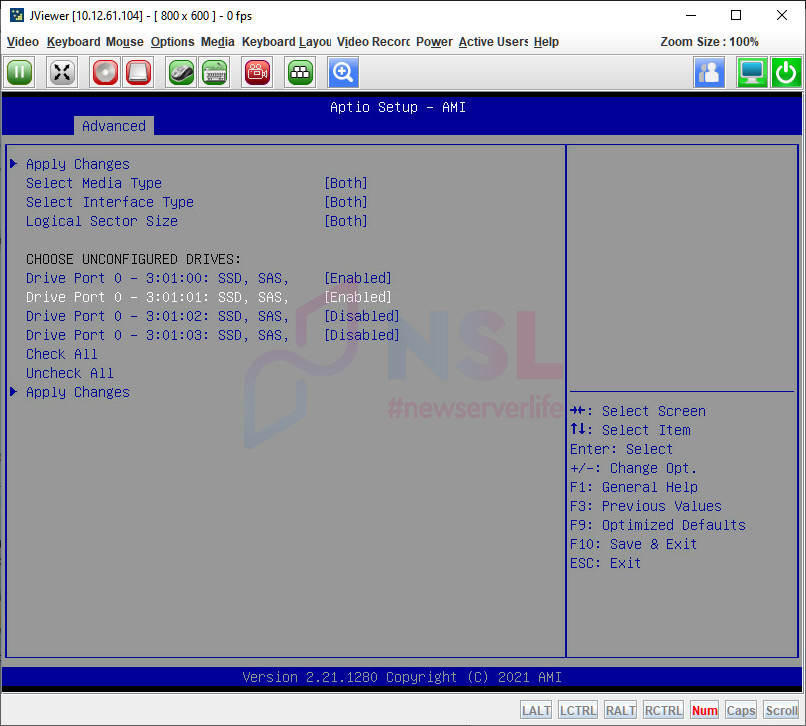
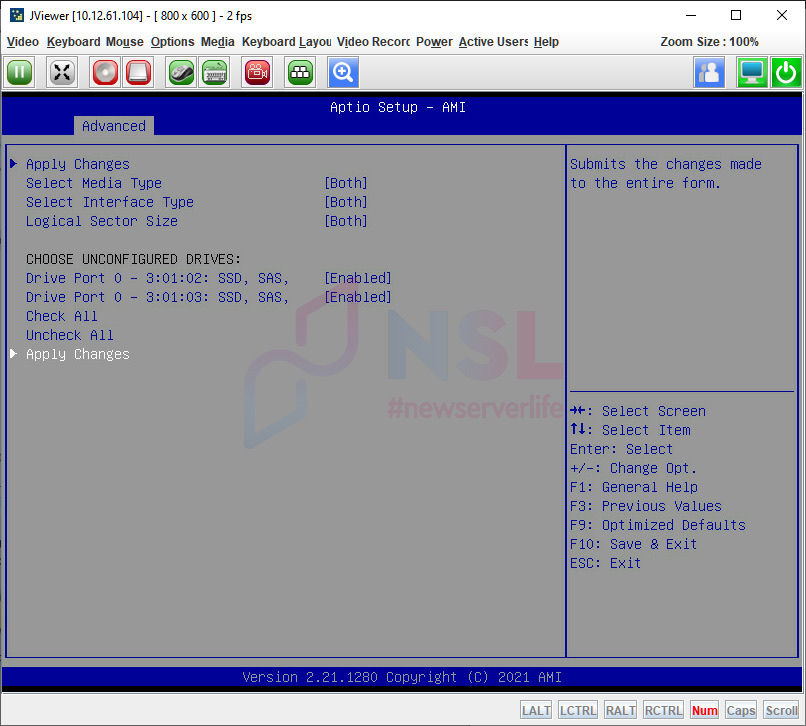
We'll pick our drives from the Unconfigured Capacity.
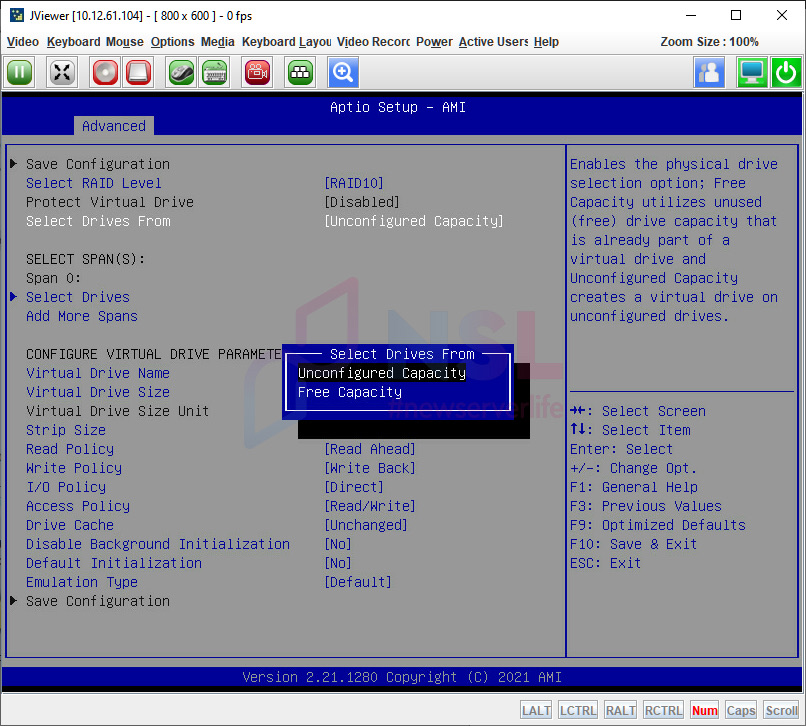
For the first pair, labeled 'Span 0', select your drives using Select Drives.
Highlight two drives with the spacebar and then click Apply Changes.
You will now be prompted to pick drives for the second pair 'Span 1'. Select Drives.
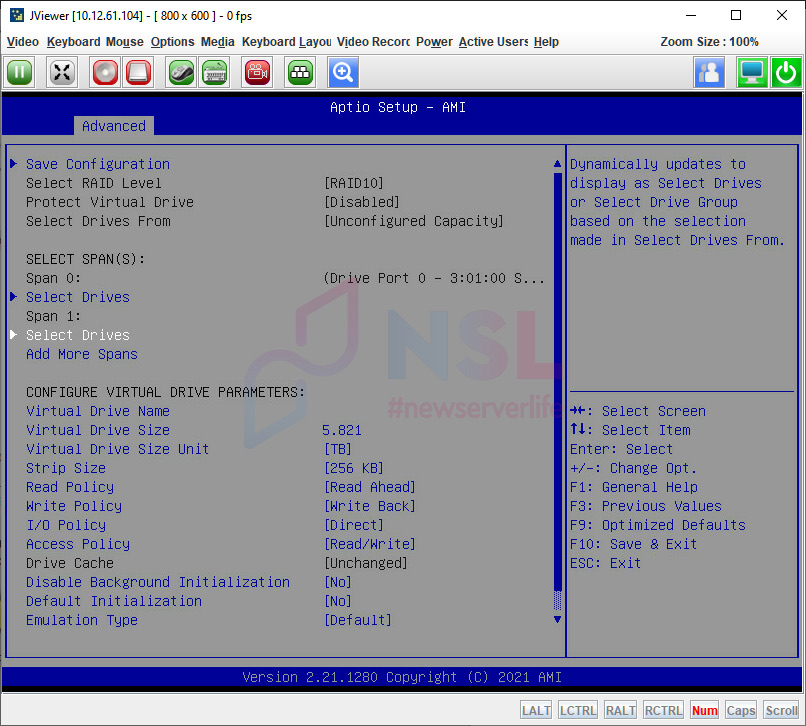
Again, choose the drives and hit Apply Changes.
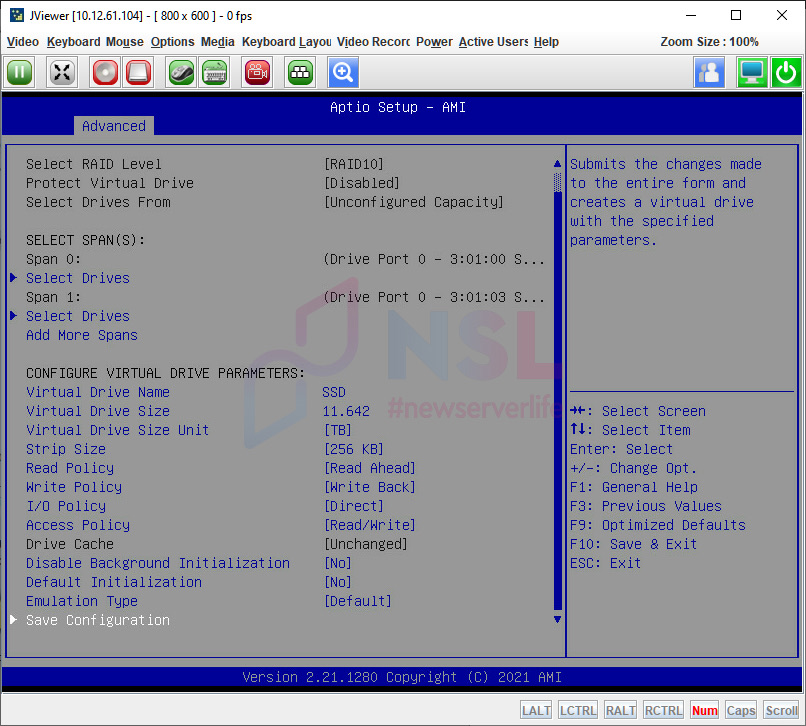
Assign a name to your array.
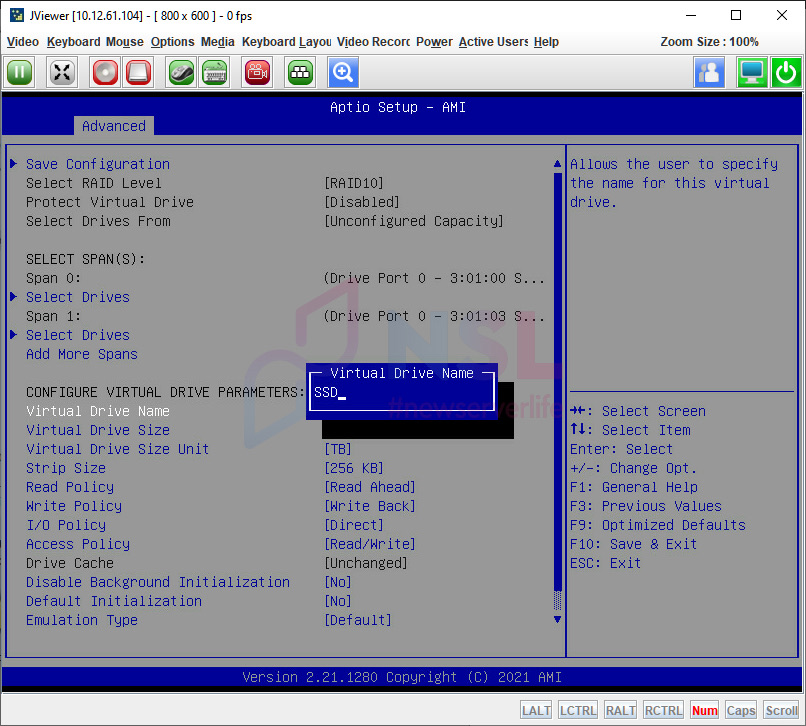
Adjust additional settings if needed and then hit Save Configuration.
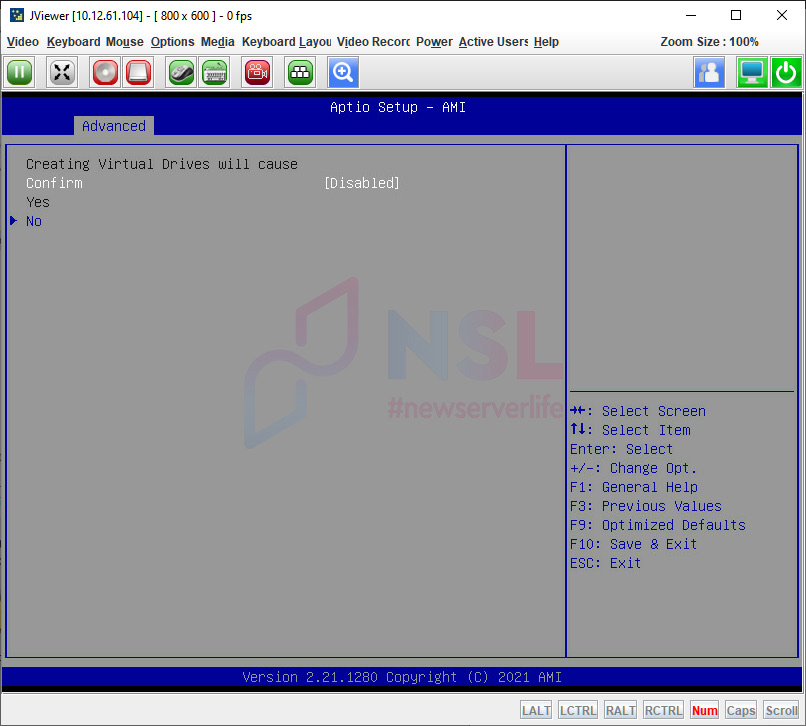
Switch 'Confirm' to Enabled. Confirm your choices by selecting Yes and then OK.
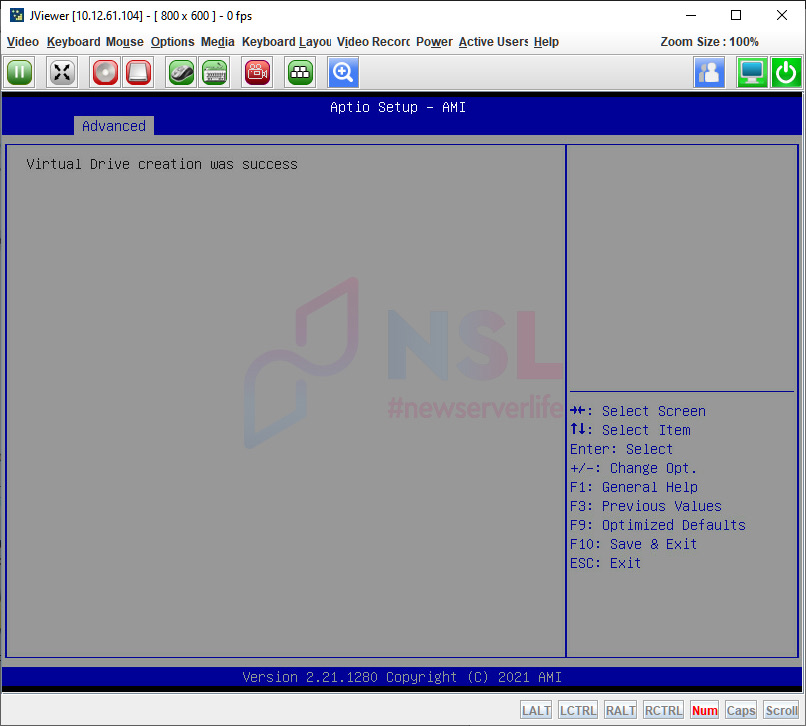
Your array is now ready. Exit with Esc.
Reviewing Array Details
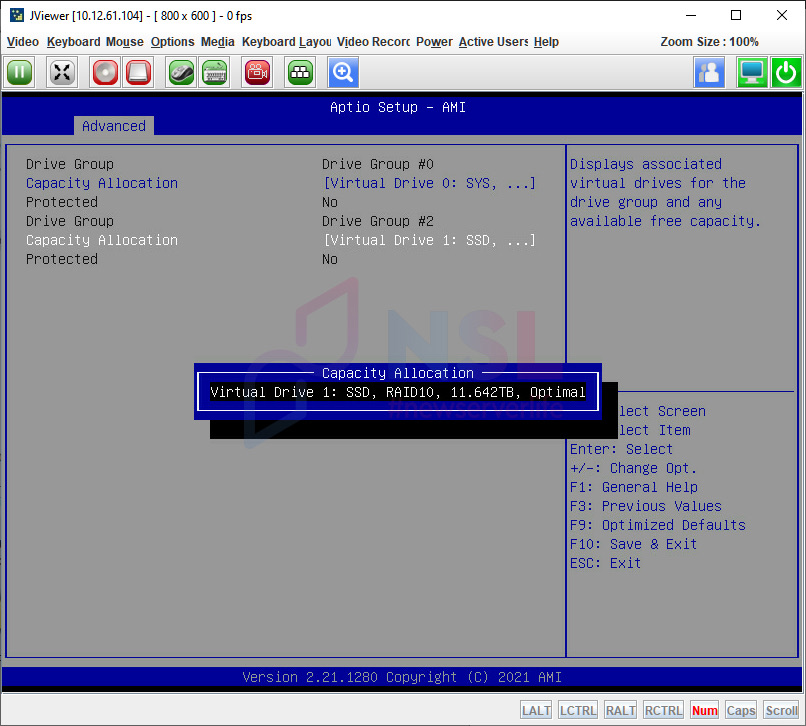
Let's examine our setup. Click on View Drive Group Properties.
You'll see two drive groups. One named 'SYS', which we previously set up using HDD drives, and the second named 'SSD', created from SSD drives. Choose the recently configured 'SSD' array.

This will display a comprehensive description. Exit with Esc.
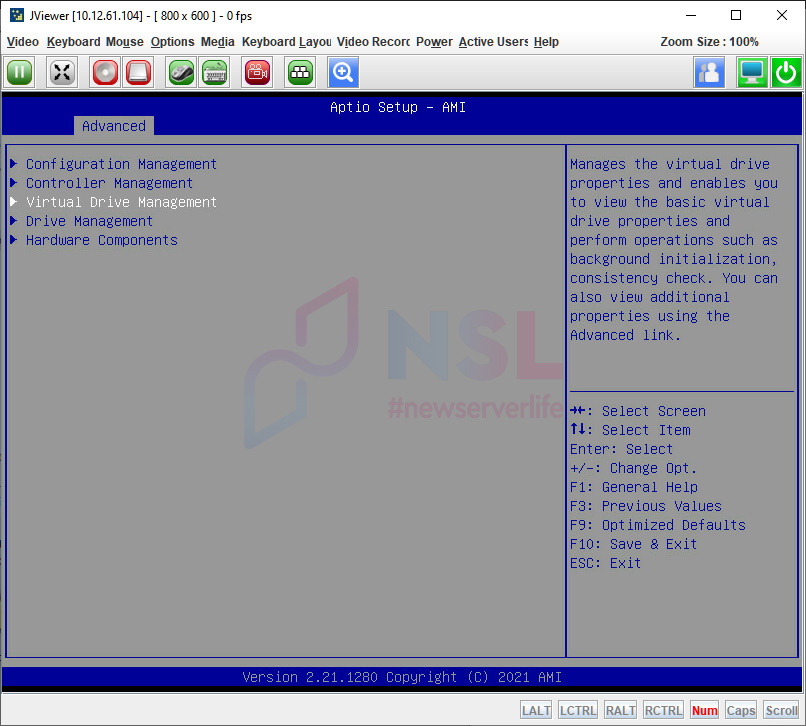
Dive into array management via Virtual Drive Management.
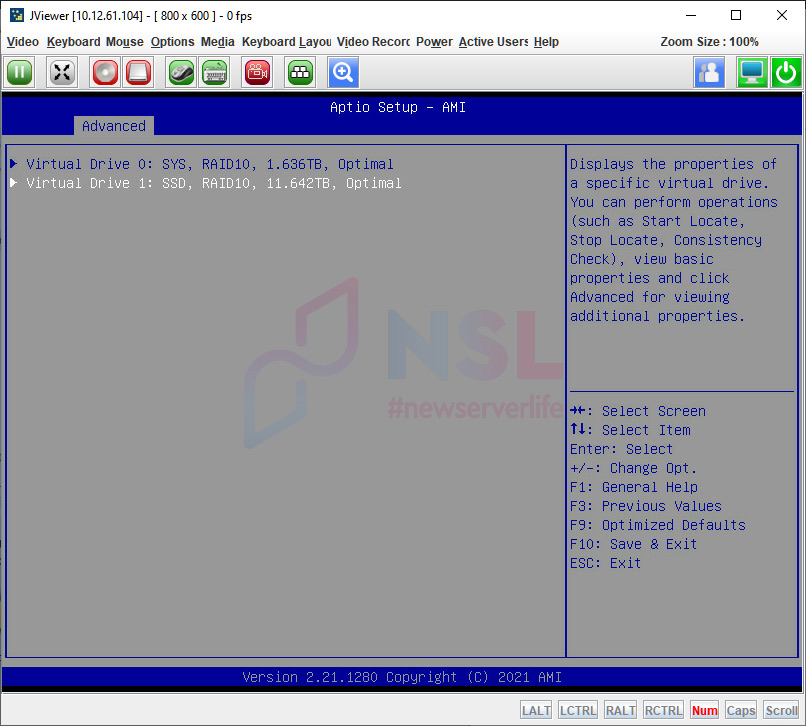
Both arrays are visible here. Select Virtual Drive 1.
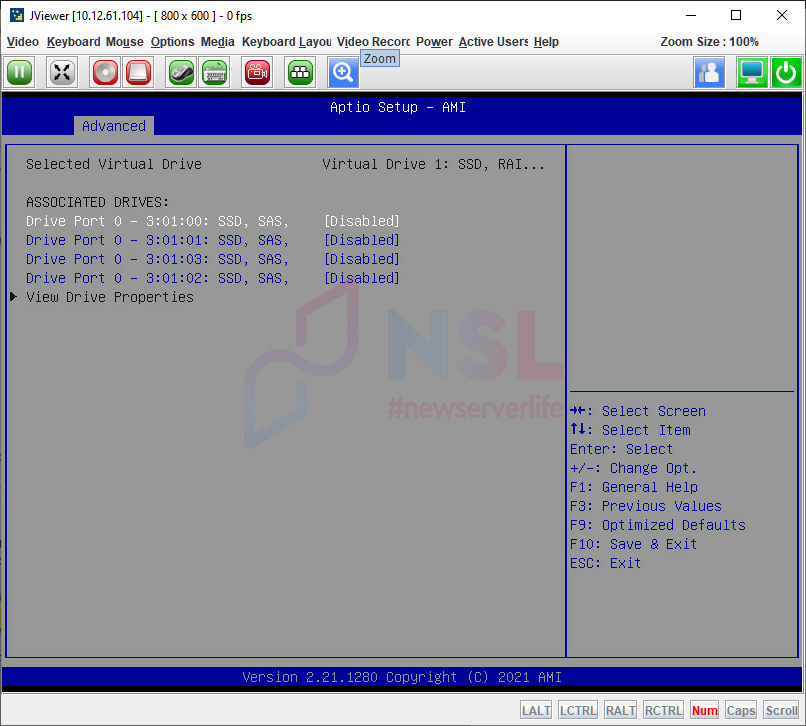
Main settings are showcased, and you can also carry out operations on the array. Click on View Associated Drives.
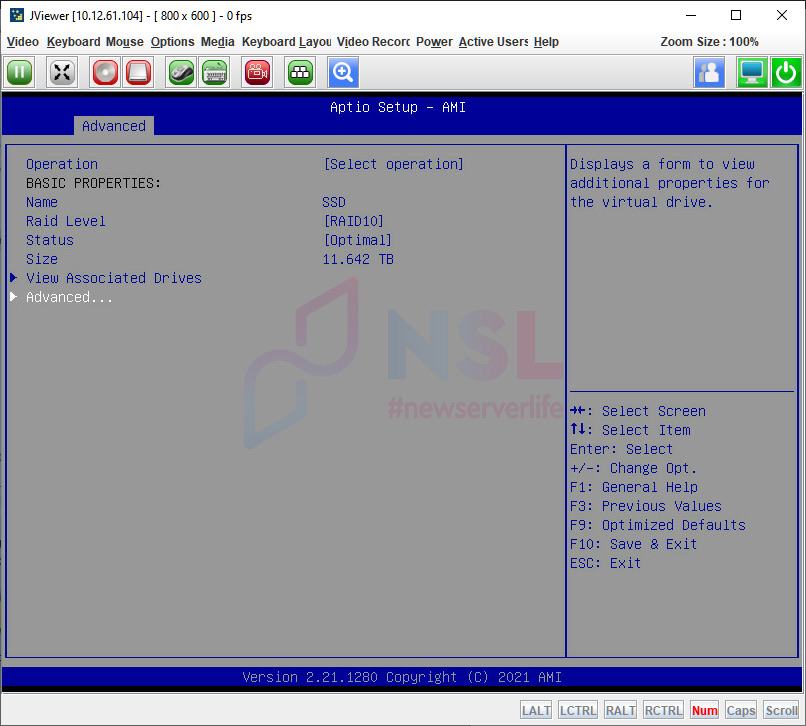
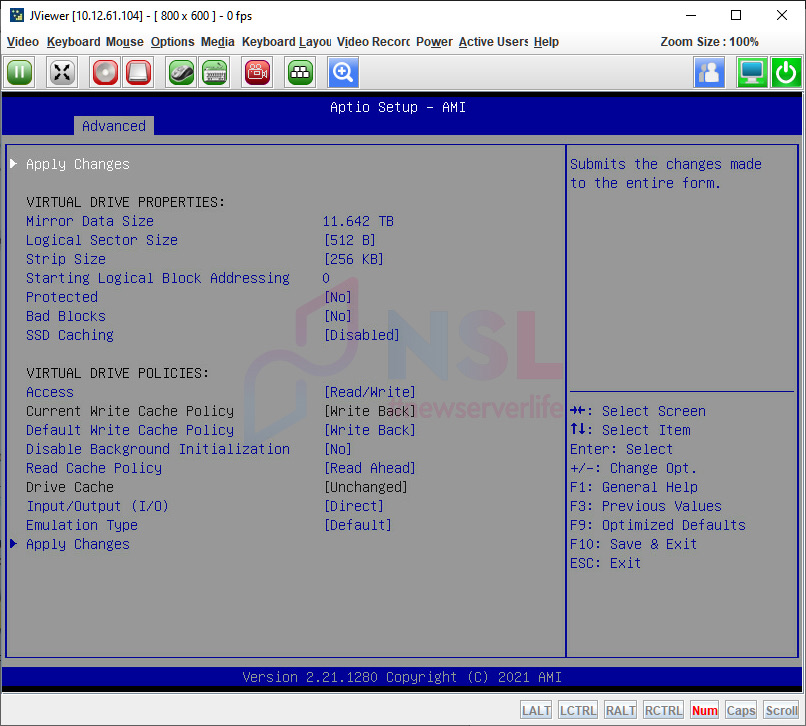
You can now see the drives associated with the array. For more details, navigate to Advanced.
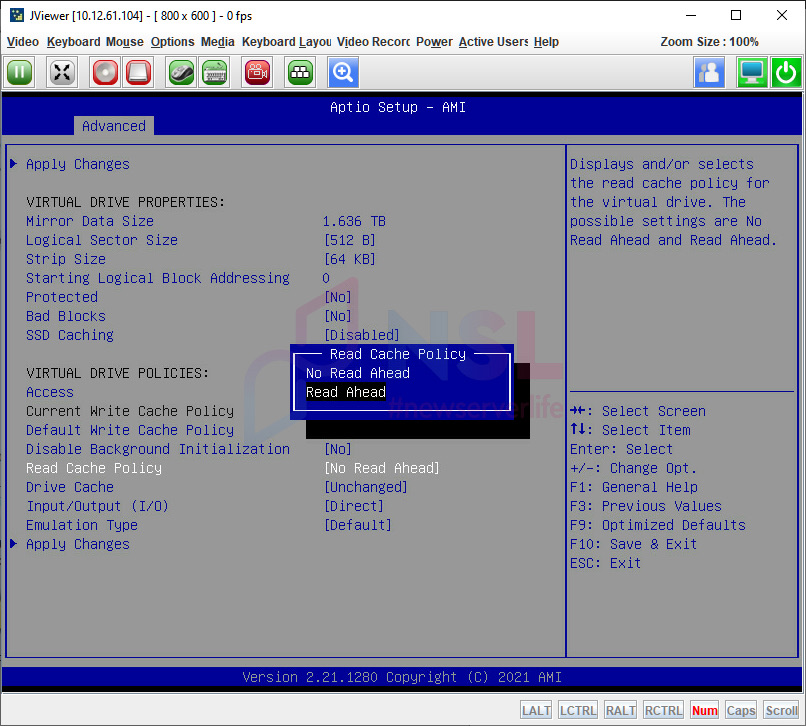
Here, additional array information is displayed. You can modify extra options, such as cache settings or Read Cache Policy.
With the array set, there's no need to save BIOS settings, but we still press F10 to reboot the server for good measure.
By following these steps, you've successfully set up a RAID10 array using four SAS SSD drives on a Gigabyte R182-N20-00 server with the MegaRAID SAS 9361-8i hardware RAID controller, courtesy of Newserverlife's expertise.